@PointCell
It’s always easier when you’re just passing ideas to others, can’t always see some of the complications until you get stuck in to actually building something 
I’ve put together a test case that shows how this could work. All in all it’s taken three flows to achieve this and I’ll explain how it works as best as I can.
First, a general overview:
Flow 1 - Questions are asked and answered. The answers are saved to a Google Sheet and passed in a webhook to the broadcast flow. An attribute is used to assign a unique ‘request’ number for each row.
Flow 2 - Retrieves the answers from the Google Sheet by searching for the request # sent in the webhook. Sends the answers in a message to the broadcast audience and also outputs a shortcut that can be clicked to claim the job (row).
Flow 3 - New message trigger that is activated by a user clicking the shortcut from Flow 2. Checks for the request number and assigns the user to the row if no user is already assigned.
For reference, here’s what my test Google Sheet looks like:
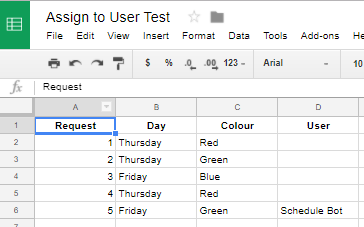
It’s the column names that are important but you can see request number 5 is a completed run of all three flows, the others were just test runs for flows 1 & 2.
–
Okay, now for a more detailed look. Let’s start with Flow 1.
Flow 1, Questions
This Flow is fairly straightforward. The user is asked two questions; “What day is it?” & “Pick a colour”.
An important thing to note here is that on my Google Sheet I manually added the first entry so that the Request column had the number 1 there.
First Row

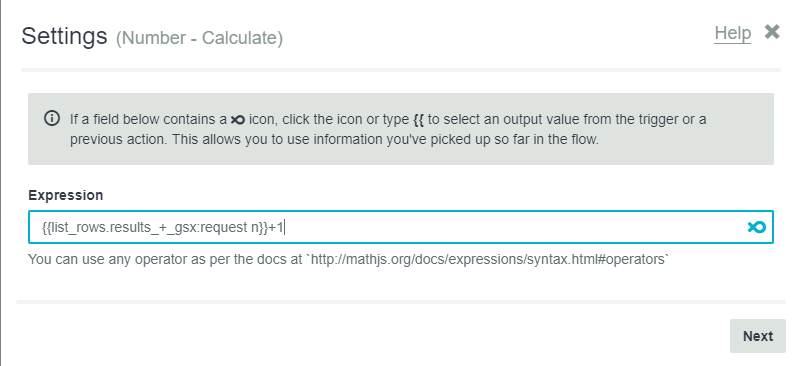
Now that we have a request number to work with we can do a list rows action to pull through all of the rows and follow it up with a simple calculation.
{{list_rows.results_+_gsx:request n}}+1
Collection Output Modifier
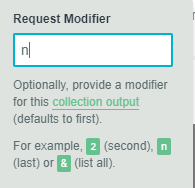
Calculation
So we’re taking the last result for the request column and adding 1 to it, which with request number 1 is simply 1+1.
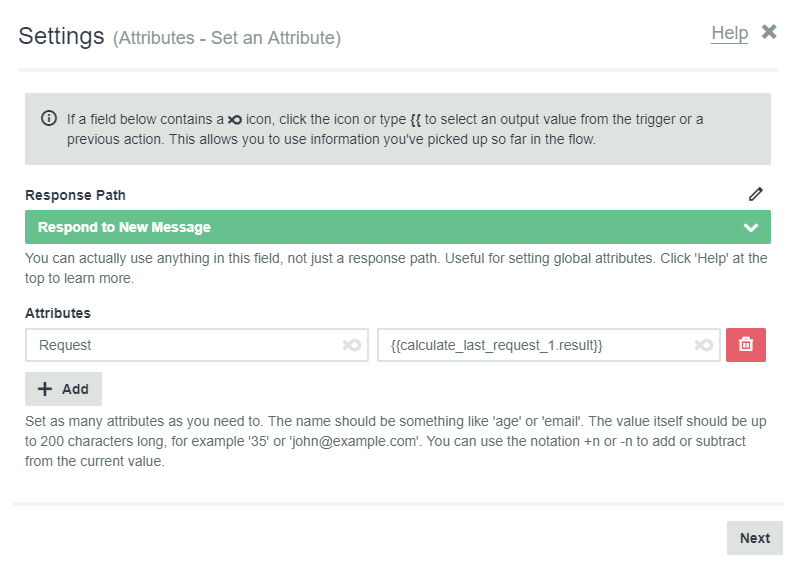
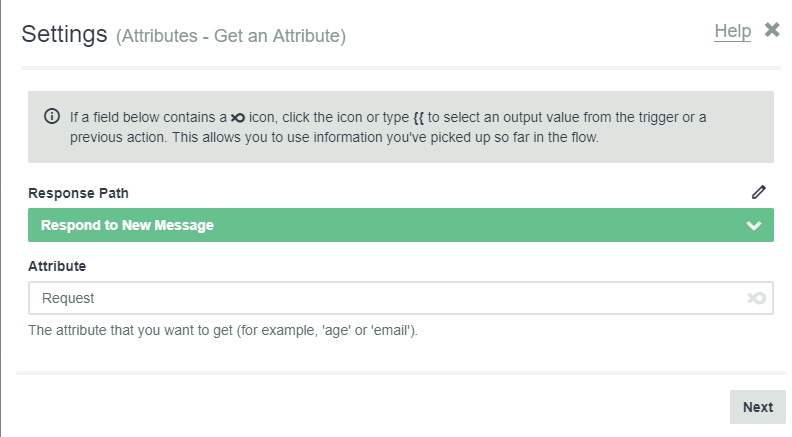
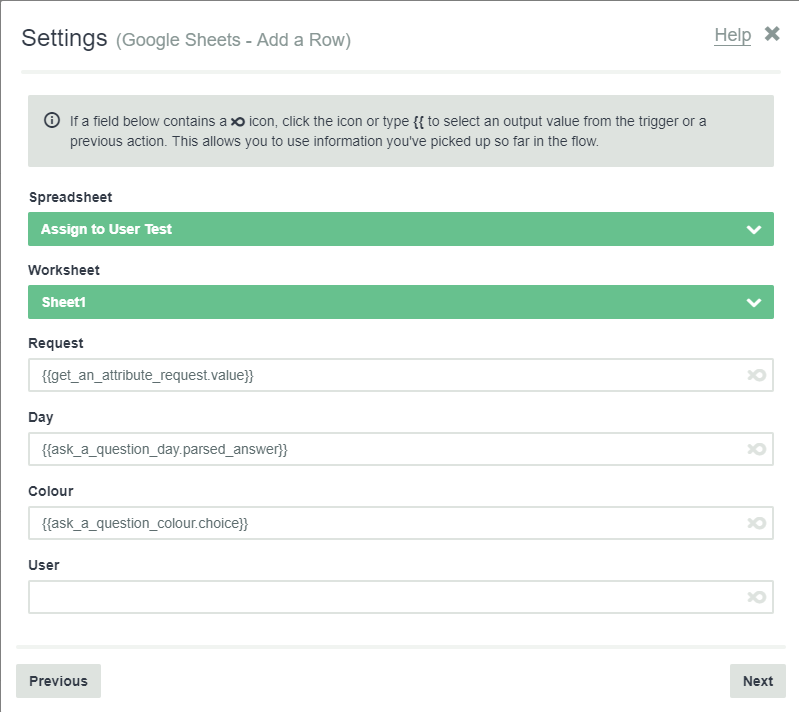
An attribute is set to contain the new request number, we get the value and then add a new row to the Google Sheet that contains the request number and the question answers.
Set Attribute
Get Attribute
Add Row
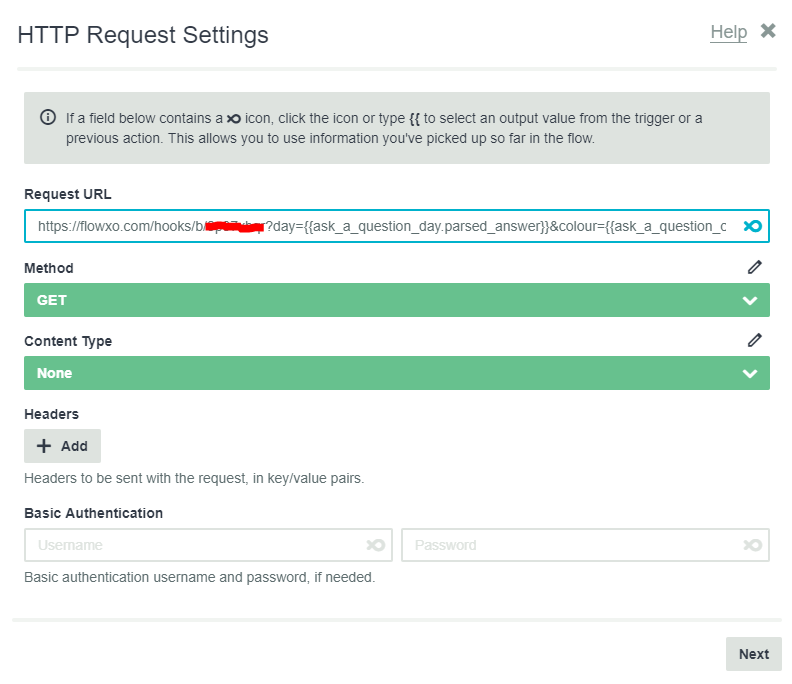
The final step for this flow is to send a webhook to trigger the broadcast flow. in the webhook I’m also passing out the request number and answers to the questions by adding them to the URL.
For example:
https://flowxo.com/hooks/b/abc123?day={{ask_a_question_day.parsed_answer}}&colour={{ask_a_question_colour.choice}}&request={{get_an_attribute_request.value}}
Webhook
The real important value to pass here is the request number.
See Using Data from the Web in Flow XO for more info on passing values between webhooks.
–
Flow 2, Broadcast
A broadcast is triggered by receiving a webhook from the previous flow.
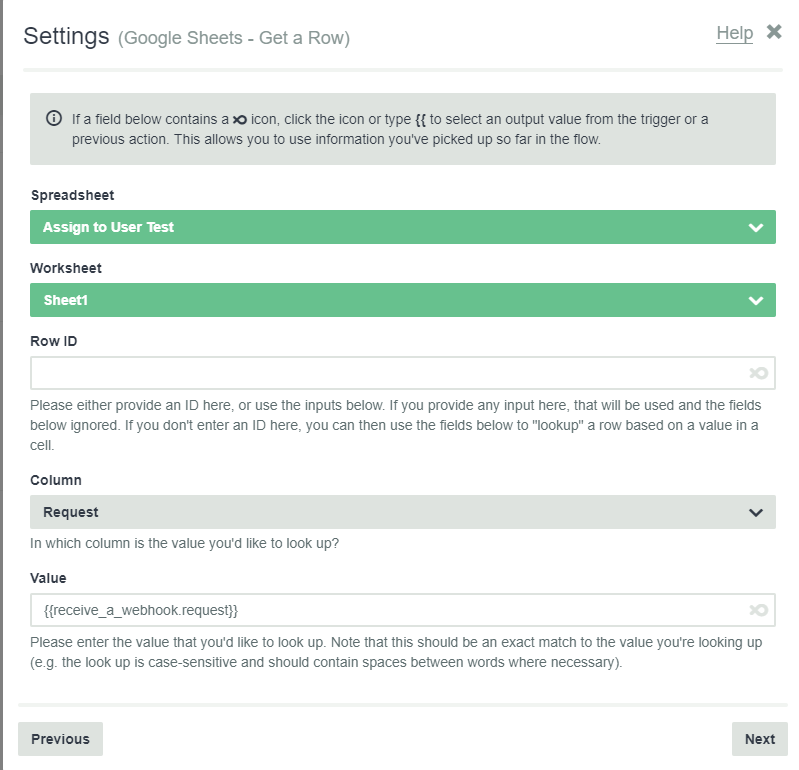
Using the received request number from the webhook a Google Sheets > Get Row action can be done to find the appropriate row.
Get a Row
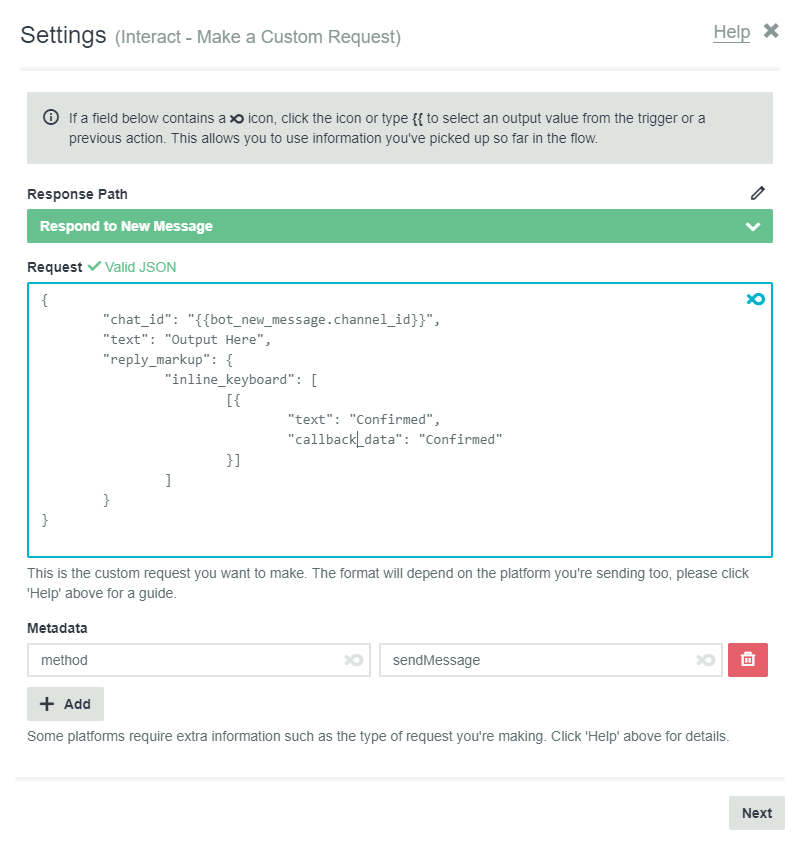
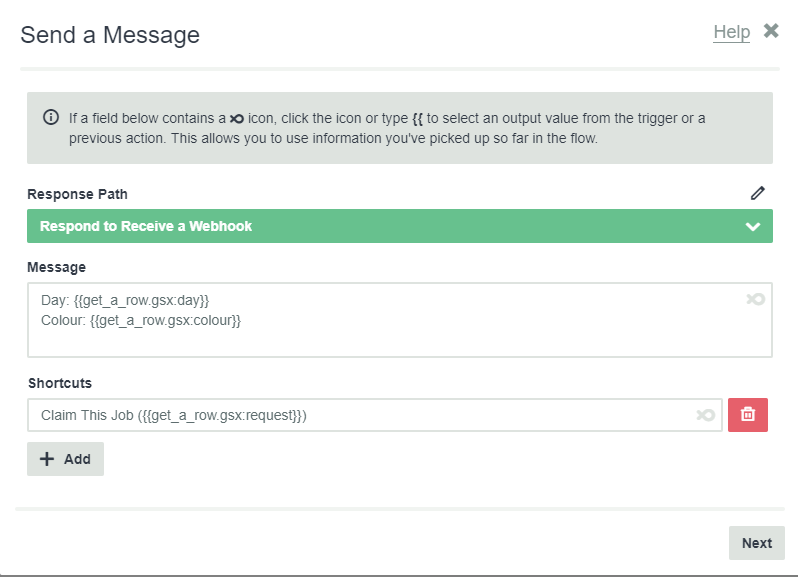
A send message action is then used to output the answers to the questions from flow 1 with a shortcut that contains the request number.
Send Message
Having the request number on the shortcut is important for the next flow.
Since we’re using a shortcut the only way to detect that a user has selected it is to have another flow with a new message trigger.
–
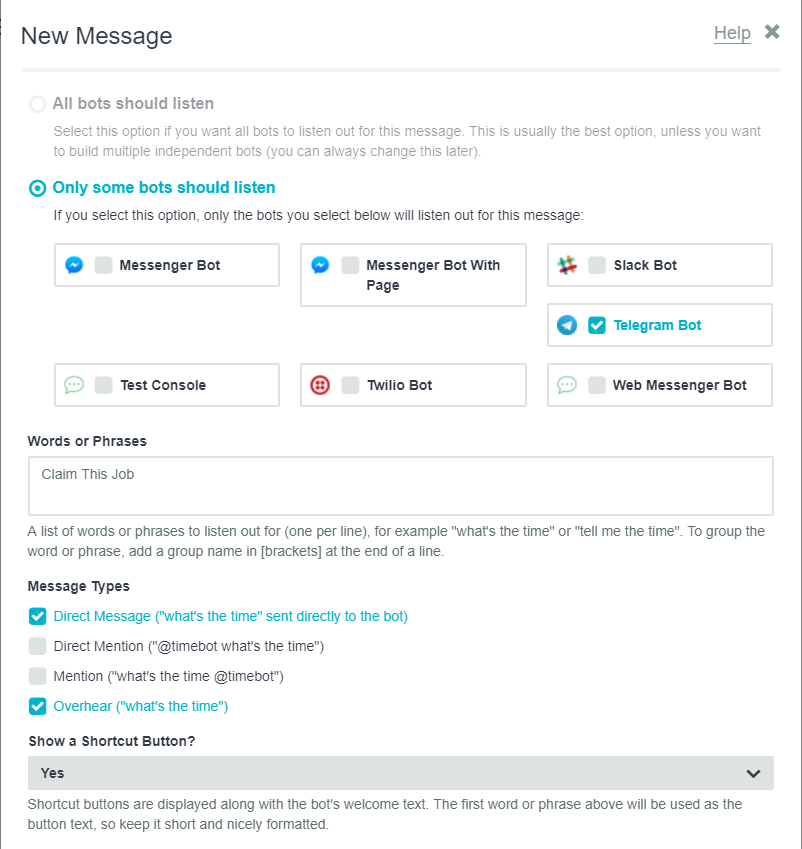
Flow 3, Assign User
A new message trigger listens out for the shortcut from Flow 2. You’ll need to make sure that the ‘Overhear’ message type is enabled for the trigger.
New Message Trigger
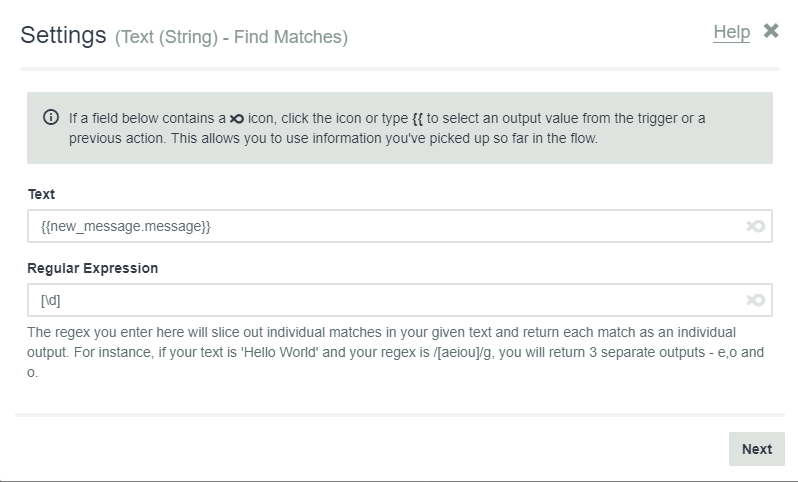
The shortcut from the previous flow also included the request number so we need to parse that value from the message. This can be done by using the Text service to Find Matches. Some basic regex is needed to find the number, the expression is [\d]
Find Match
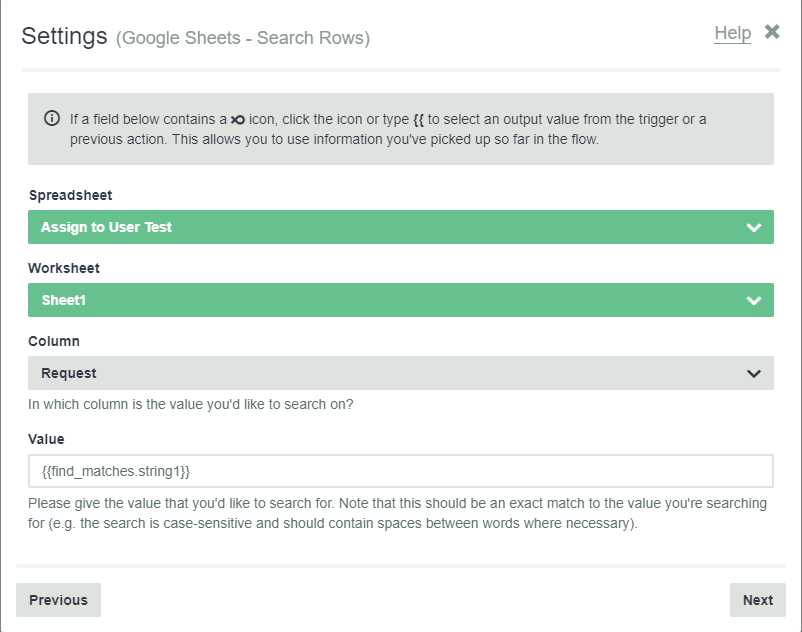
Now that we have the request number we can do a Search Rows action to find the right row.
Search Row
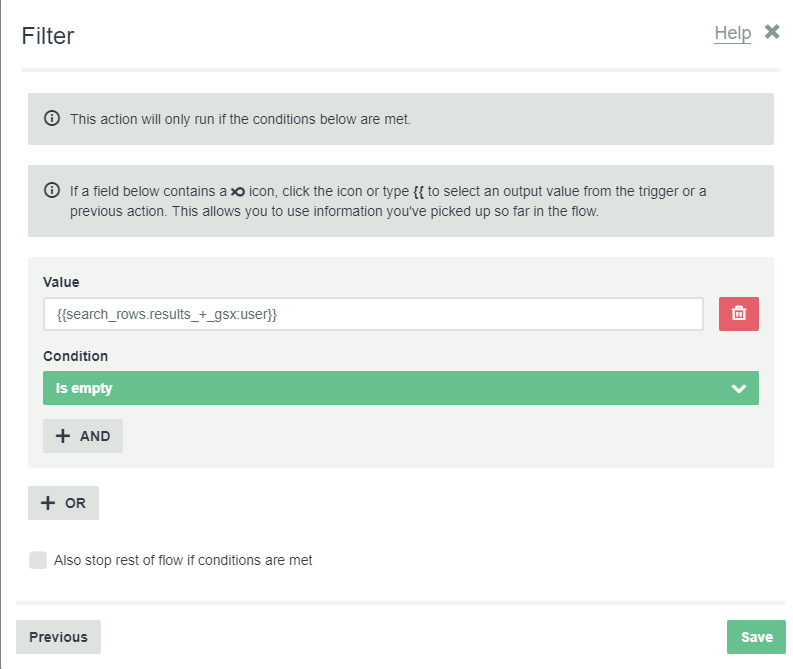
Now the filters start to come into play. We need one of two things to happen:
- No user is assigned to the row so the person that clicked on the shortcut is assigned to it.
- A user is already assigned so the person that clicked on the shortcut is told that they can’t be assigned.
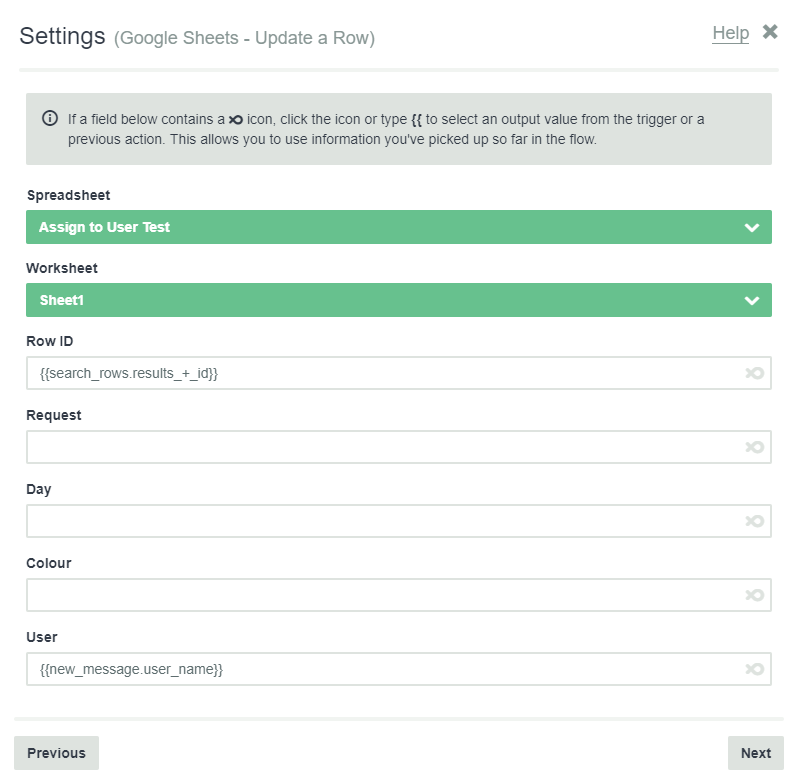
Scenario one will run an Update Row action IF {{search_rows.results_+_gsx:user}} Is Empty.
You can use the row ID returned from the previous search rows action.
Update Row
Filter for Update Row
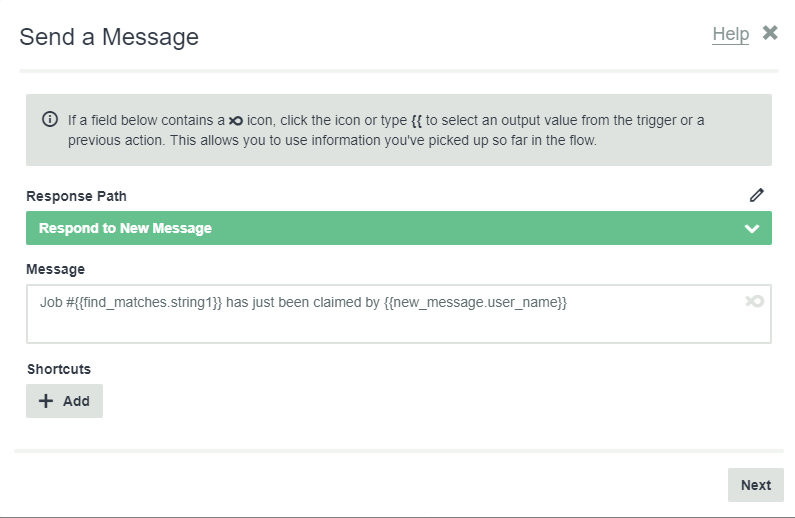
You can output a message to confirm that the user has been assigned, again, using the same filter.
Send Message
Send Message Filter
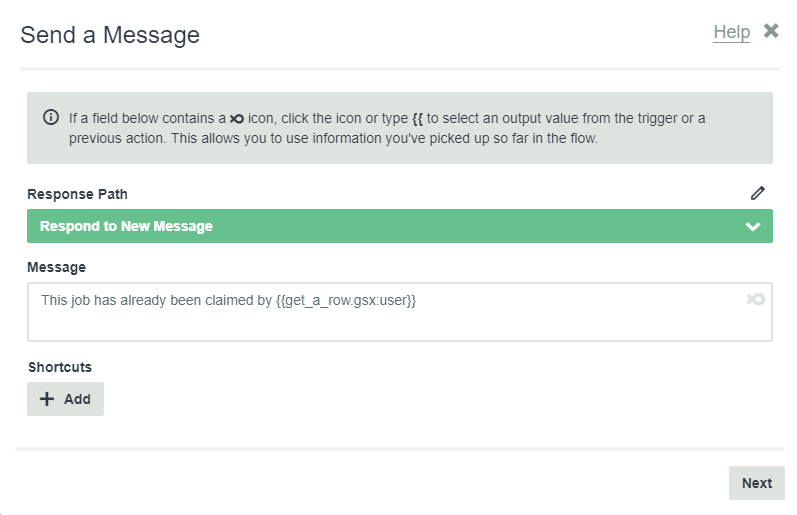
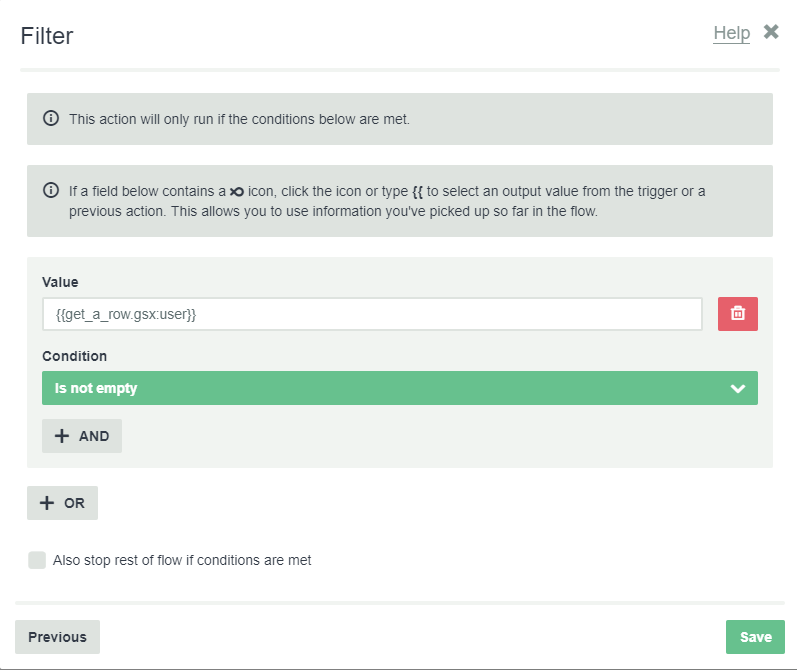
Scenario 2 sends a message if a user is already assigned and also outputs that user’s name.
Send Message
Send Message Filter
–
And that’s it. Possibly a bit over engineered but it should do the trick.
Hopefully it helps! 
Thanks,
Dan